Open-source RightAI Tools Directory
  • Discover AI
  • Submit
  • Startup
  • Blog
Open-source RightAI Tools Directory
Discover the best AI tools of 2025 with the RightAI Tools Directory!

Friend Links

AI Anime GeneratorToolsApp AI

Support

Tap4
Privacy policyTerms & ConditionsContact Us
Loading...
loading...

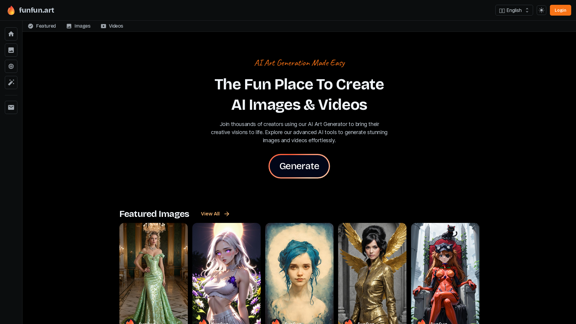
The Exciting Destination for Generating AI Images & Videos

Join thousands of creators using our AI Art Generator to bring their creative visions to life. Explore our advanced AI tools to generate stunning images and videos effortlessly.
Visit Website
The Exciting Destination for Generating AI Images & Videos
Visit Website

Introduction

FunFun.art is a cutting-edge AI art generation platform that empowers users to create stunning images and videos using advanced artificial intelligence tools. The platform caters to creators of all skill levels, offering a user-friendly interface and a wide range of features to bring artistic visions to life effortlessly.

Feature

AI Image Generation

Transform ideas into captivating visuals using state-of-the-art AI technology. Create unique artwork, illustrations, and designs with just a few clicks.

AI Video Creation

Generate AI-powered videos to bring stories to life with dynamic, animated content that captivates audiences.

Featured Gallery

Explore a curated collection of user-generated AI art in the Featured Images and Featured Videos sections, providing inspiration and showcasing community creativity.

User-Friendly Interface

Intuitive platform design makes AI art creation accessible to everyone, regardless of technical expertise.

Multilingual Support

Enjoy the platform in multiple languages, including English, Deutsch, Français, Italiano, Español, and more.

Vibrant Community

Join thousands of creators pushing the boundaries of AI-generated art, fostering collaboration and inspiration.

Affiliate Program

Partner with FunFun.art to grow together and expand the reach of AI-generated art.

FAQ

What is FunFun.art?

FunFun.art is an AI-powered platform for creating stunning images and videos using advanced artificial intelligence tools. It caters to creators of all skill levels, from professional artists to curious beginners.

What types of AI-generated content can I create on FunFun.art?

Users can create:

  • AI-generated images (artwork, illustrations, designs)
  • AI-powered videos (animated content, dynamic visuals)

How does FunFun.art support different languages?

The platform offers multilingual support, including:

Languages
English
Deutsch
Français
Italiano
Español
And more

How can I connect with the FunFun.art community?

You can connect through:

  • Email: [email protected]
  • Discord: Join the community for discussions and support
  • Affiliate Program: Partner with FunFun.art for mutual growth

What additional resources does FunFun.art offer?

FunFun.art provides:

  • AI Tools Directory
  • AI Characters
  • Privacy Policy

Related Websites

Stability AI
View Detail

Stability AI

Stability AI

Activating humanity's potential through generative AI. Open models in every modality, for everyone, everywhere.

734.70 K
Idolly
View Detail

Idolly

Idolly

Explore idolly.ai, where imagination meets AI image creation and BlockChain. Create stunning visuals with ease using our Face Transfer and Mood Fusion technology.

9.70 K
Image Describer - Free AI to Describe Images Online (No Login Required)
View Detail

Image Describer - Free AI to Describe Images Online (No Login Required)

Image Describer - Free AI to Describe Images Online (No Login Required)

Discover AI-Powered Image Descriptions with Image Describer. Gain Instant Insights and Unlock New Perspectives and Efficiency for Your Work and Creations. Join Us Today!

25.53 K
Prisma Labs
View Detail

Prisma Labs

Prisma Labs

Shaping the future of photo and video editing.

74.21 K
IC Light v2
View Detail

IC Light v2

IC Light v2

IC-Light is a project to manipulate the illumination of images. IC-Light V2 is a series of Flux-based IC-Light models with 16ch VAE and native high resolution.

0
Lushair, AI-Powered Hair & Scalp Analysis | Personalized Care Solutions
View Detail

Lushair, AI-Powered Hair & Scalp Analysis | Personalized Care Solutions

Lushair, AI-Powered Hair & Scalp Analysis | Personalized Care Solutions

Unlock the secrets of healthy hair with our AI-powered hair and scalp analysis. Discover personalized insights, effective treatments, and embrace a vibrant, confident you. Elevate your hair care journey with cutting-edge technology and expert analysis.

0
Batch Save ChatGPT to Notion

This is a guide on how to save multiple ChatGPT responses to Notion in a batch. 

Tools You'll Need:

* ChatGPT: An AI chatbot that can generate text.
* Notion: A note-taking and project management tool.
* Python: A programming language.
* Requests Library: A Python library for making HTTP requests.

Steps:

1. Get Your Notion API Token:
   - Go to your Notion workspace settings.
   - Navigate to the "Integrations" tab.
   - Click "Create new integration" and choose "API Token".
   - Copy your API token.

2. Install Python Libraries:
   - Open your terminal or command prompt.
   - Type `pip install requests` and press Enter.

3. Write Python Script:
   - Create a new Python file (e.g., `save_chatgpt_to_notion.py`).
   - Paste the following code into the file, replacing `YOUR_NOTION_API_TOKEN` with your actual token:

```python
import requests

def save_chatgpt_response_to_notion(response, page_id, token):
  """Saves a ChatGPT response to a Notion page."""
  url = f"https://api.notion.com/v1/pages/{page_id}/children"
  headers = {"Authorization": f"Bearer {token}"}
  data = {
    "parent": {
      "page_id": page_id
    },
    "properties": {
      "title": {
        "title": [
          {
            "text": {
              "content": "ChatGPT Response"
            }
          }
        ]
      },
      "content": {
        "rich_text": [
          {
            "text": {
              "content": response
            }
          }
        ]
      }
    }
  }
  response = requests.post(url, headers=headers, json=data)
  print(response.status_code)

Example usage
page_id = "YOUR_NOTION_PAGE_ID"
token = "YOUR_NOTION_API_TOKEN"

Get ChatGPT responses (replace with your actual ChatGPT interaction)
chatgpt_responses = [
  "This is the first ChatGPT response.",
  "This is the second ChatGPT response.",
  "This is the third ChatGPT response."
]

Save each response to Notion
for response in chatgpt_responses:
  save_chatgpt_response_to_notion(response, page_id, token)
```

4. Run the Script:
   - In your terminal, navigate to the directory where you saved the Python file.
   - Type `python save_chatgpt_to_notion.py` and press Enter.

5. Check Notion:
   - Open your Notion workspace and go to the page specified by `page_id`.
   - You should see your ChatGPT responses saved as separate blocks.
View Detail

Batch Save ChatGPT to Notion This is a guide on how to save multiple ChatGPT responses to Notion in a batch. Tools You'll Need: * ChatGPT: An AI chatbot that can generate text. * Notion: A note-taking and project management tool. * Python: A programming language. * Requests Library: A Python library for making HTTP requests. Steps: 1. Get Your Notion API Token: - Go to your Notion workspace settings. - Navigate to the "Integrations" tab. - Click "Create new integration" and choose "API Token". - Copy your API token. 2. Install Python Libraries: - Open your terminal or command prompt. - Type `pip install requests` and press Enter. 3. Write Python Script: - Create a new Python file (e.g., `save_chatgpt_to_notion.py`). - Paste the following code into the file, replacing `YOUR_NOTION_API_TOKEN` with your actual token: ```python import requests def save_chatgpt_response_to_notion(response, page_id, token): """Saves a ChatGPT response to a Notion page.""" url = f"https://api.notion.com/v1/pages/{page_id}/children" headers = {"Authorization": f"Bearer {token}"} data = { "parent": { "page_id": page_id }, "properties": { "title": { "title": [ { "text": { "content": "ChatGPT Response" } } ] }, "content": { "rich_text": [ { "text": { "content": response } } ] } } } response = requests.post(url, headers=headers, json=data) print(response.status_code) Example usage page_id = "YOUR_NOTION_PAGE_ID" token = "YOUR_NOTION_API_TOKEN" Get ChatGPT responses (replace with your actual ChatGPT interaction) chatgpt_responses = [ "This is the first ChatGPT response.", "This is the second ChatGPT response.", "This is the third ChatGPT response." ] Save each response to Notion for response in chatgpt_responses: save_chatgpt_response_to_notion(response, page_id, token) ``` 4. Run the Script: - In your terminal, navigate to the directory where you saved the Python file. - Type `python save_chatgpt_to_notion.py` and press Enter. 5. Check Notion: - Open your Notion workspace and go to the page specified by `page_id`. - You should see your ChatGPT responses saved as separate blocks.

Batch Save ChatGPT to Notion This is a guide on how to save multiple ChatGPT responses to Notion in a batch. Tools You'll Need: * ChatGPT: An AI chatbot that can generate text. * Notion: A note-taking and project management tool. * Python: A programming language. * Requests Library: A Python library for making HTTP requests. Steps: 1. Get Your Notion API Token: - Go to your Notion workspace settings. - Navigate to the "Integrations" tab. - Click "Create new integration" and choose "API Token". - Copy your API token. 2. Install Python Libraries: - Open your terminal or command prompt. - Type `pip install requests` and press Enter. 3. Write Python Script: - Create a new Python file (e.g., `save_chatgpt_to_notion.py`). - Paste the following code into the file, replacing `YOUR_NOTION_API_TOKEN` with your actual token: ```python import requests def save_chatgpt_response_to_notion(response, page_id, token): """Saves a ChatGPT response to a Notion page.""" url = f"https://api.notion.com/v1/pages/{page_id}/children" headers = {"Authorization": f"Bearer {token}"} data = { "parent": { "page_id": page_id }, "properties": { "title": { "title": [ { "text": { "content": "ChatGPT Response" } } ] }, "content": { "rich_text": [ { "text": { "content": response } } ] } } } response = requests.post(url, headers=headers, json=data) print(response.status_code) Example usage page_id = "YOUR_NOTION_PAGE_ID" token = "YOUR_NOTION_API_TOKEN" Get ChatGPT responses (replace with your actual ChatGPT interaction) chatgpt_responses = [ "This is the first ChatGPT response.", "This is the second ChatGPT response.", "This is the third ChatGPT response." ] Save each response to Notion for response in chatgpt_responses: save_chatgpt_response_to_notion(response, page_id, token) ``` 4. Run the Script: - In your terminal, navigate to the directory where you saved the Python file. - Type `python save_chatgpt_to_notion.py` and press Enter. 5. Check Notion: - Open your Notion workspace and go to the page specified by `page_id`. - You should see your ChatGPT responses saved as separate blocks.

Save ChatGPT Conversations to Notion with One Click Export your ChatGPT conversations directly to Notion with a single click.

193.90 M
Stickers AI Generator
View Detail

Stickers AI Generator

Stickers AI Generator

Unleash your imagination with AI stickers. Captivating visuals brought to life by cutting-edge generative AI.

0