Open-source RightAI Tools Directory
  • Discover AI
  • Submit
  • Startup
  • Blog
Open-source RightAI Tools Directory
Discover the best AI tools of 2025 with the RightAI Tools Directory!

Friend Links

AI Anime GeneratorToolsApp AI

Support

Tap4
Privacy policyTerms & ConditionsContact Us
Loading...
loading...

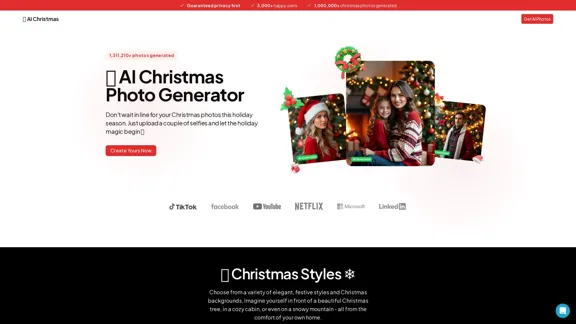
AI Christmas Photo Generator | The Best Christmas AI Generator

Don't wait in line for your Christmas photos this holiday season. Just upload a couple of selfies and let the holiday magic begin 💫
Visit Website
AI Christmas Photo Generator | The Best Christmas AI Generator
Visit Website

Introduction

The AI Christmas Photo Generator allows users to create personalized Christmas-themed photos quickly and easily. By simply uploading selfies, users can generate festive images featuring various backgrounds and styles, making it a fun and convenient option for holiday celebrations. With over a million photos generated and a commitment to privacy, this tool is designed to enhance the holiday experience for everyone.

Feature

  1. Variety of Styles

    Users can choose from a wide range of elegant and festive styles, including options like Winter Wonderland, Christmas Magic, and Snowy Mountains.

  2. Quick Photo Generation

    The AI technology enables users to generate personalized Christmas photos in just minutes, making it a fast solution for holiday photo needs.

  3. User-Friendly Interface

    The platform is designed to be intuitive, allowing users to easily upload selfies and select their desired backgrounds without any technical expertise.

  4. Guaranteed Privacy

    The service prioritizes user privacy, ensuring that all uploaded photos and generated content are handled securely.

  5. High Customer Satisfaction

    With thousands of happy users, the AI Christmas Photo Generator has proven to be a popular choice for creating festive memories.

How to Use?

  1. Visit the AI Christmas Photo Generator website.
  2. Upload your selfies to the platform.
  3. Choose your preferred Christmas style and background.
  4. Click on the generate button to create your personalized Christmas photo.
  5. Download and share your festive images with friends and family.

FAQ

What is the AI Christmas Photo Generator?

The AI Christmas Photo Generator is an online tool that allows users to create personalized Christmas-themed photos by uploading selfies and selecting festive backgrounds and styles.

How does the photo generation process work?

Users upload their selfies, choose a Christmas style and background, and the AI technology generates a unique photo in minutes.

Is my privacy protected when using this service?

Yes, the AI Christmas Photo Generator guarantees user privacy and ensures that all uploaded images and generated content are handled securely.

Can I use the generated photos for personal projects?

Yes, the photos created using the AI Christmas Photo Generator can be used for personal projects, sharing on social media, or holiday greetings.

How can I contact support if I have questions?

You can reach out to support via the contact number +1 (209) 758-5089 or email [email protected].

Price

  • Free Plan: $0/month
  • Basic Plan: $9.99/month
  • Standard Plan: $19.99/month
  • Professional Plan: $49.99/month
The price is for reference only, please refer to the latest official data for actual information.

Evaluation

  1. The AI Christmas Photo Generator excels in providing a quick and enjoyable way to create festive photos, appealing to a wide audience looking for holiday cheer.

  2. The variety of styles and backgrounds enhances user experience, allowing for creative personalization.

  3. However, the platform could benefit from additional features, such as more advanced editing options or the ability to create themed collages.

  4. While the service is user-friendly, providing tutorials or tips for maximizing photo quality could further improve user satisfaction.

  5. Overall, the AI Christmas Photo Generator is a delightful tool for holiday photo creation, though expanding its features could enhance its appeal even more.

Latest Traffic Insights

  • Monthly Visits

    295

  • Bounce Rate

    37.56%

  • Pages Per Visit

    1.02

  • Time on Site(s)

    0.00

  • Global Rank

    -

  • Country Rank

    -

Recent Visits

Traffic Sources

  • Social Media:
    3.78%
  • Paid Referrals:
    2.01%
  • Email:
    0.18%
  • Referrals:
    14.01%
  • Search Engines:
    40.71%
  • Direct:
    38.61%
More Data

Related Websites

SubEasy: AI Powered Audio Transcription & Video Subtitles
View Detail

SubEasy: AI Powered Audio Transcription & Video Subtitles

SubEasy: AI Powered Audio Transcription & Video Subtitles

SubEasy.ai提供具有无与伦比的准确性的人工智能自动转录和翻译服务,跨越100种语言的上下文感知AI翻译。现在注册!

422.02 K
Effortless Image Splitting Tool for Creative Projects
View Detail

Effortless Image Splitting Tool for Creative Projects

Effortless Image Splitting Tool for Creative Projects

Easily split large images online into smaller parts for social media, web design, and creative projects with our intuitive Image Splitter tool.

9.99 K
Screenshoter, Screen Recording, ChatGPT
View Detail

Screenshoter, Screen Recording, ChatGPT

Screenshoter, Screen Recording, ChatGPT

NEW FEATURE: 'Ask AI' based on ChatGPT! Highlight an area and ask it to solve a problem, explain, translate, and more!

193.90 M
Painnt - Art & Cartoon Filters on the App Store
View Detail

Painnt - Art & Cartoon Filters on the App Store

Painnt - Art & Cartoon Filters on the App Store

Painnt is the ultimate photo editor. Turn your photos into art masterpieces, or awesome cartoon photos. If you like digital art, you'll love Painnt! Choose fro...

124.77 M
Machina
View Detail

Machina

Machina

2.41 K
Skiing VOC
View Detail

Skiing VOC

Skiing VOC

Amazon Seller's Best Review Analysis Partner~

193.90 M
Here is the translation:

Create Perfect Circles in Minecraft with Minecraft Circle Generator | minecraftcirclegenerate.cc
View Detail

Here is the translation: Create Perfect Circles in Minecraft with Minecraft Circle Generator | minecraftcirclegenerate.cc

Here is the translation: Create Perfect Circles in Minecraft with Minecraft Circle Generator | minecraftcirclegenerate.cc

Create perfect circles and ovals in Minecraft with our easy-to-use generator. Customize size and style, then download your designs!

0
Batch Save ChatGPT to Notion

This is a guide on how to save multiple ChatGPT responses to Notion in a batch. 

Tools You'll Need:

* ChatGPT: An AI chatbot that can generate text.
* Notion: A note-taking and project management tool.
* Python: A programming language.
* Requests Library: A Python library for making HTTP requests.

Steps:

1. Get Your Notion API Token:
   - Go to your Notion workspace settings.
   - Navigate to the "Integrations" tab.
   - Click "Create new integration" and choose "API Token".
   - Copy your API token.

2. Install Python Libraries:
   - Open your terminal or command prompt.
   - Type `pip install requests` and press Enter.

3. Write Python Script:
   - Create a new Python file (e.g., `save_chatgpt_to_notion.py`).
   - Paste the following code into the file, replacing `YOUR_NOTION_API_TOKEN` with your actual token:

```python
import requests

def save_chatgpt_response_to_notion(response, page_id, token):
  """Saves a ChatGPT response to a Notion page."""
  url = f"https://api.notion.com/v1/pages/{page_id}/children"
  headers = {"Authorization": f"Bearer {token}"}
  data = {
    "parent": {
      "page_id": page_id
    },
    "properties": {
      "title": {
        "title": [
          {
            "text": {
              "content": "ChatGPT Response"
            }
          }
        ]
      },
      "content": {
        "rich_text": [
          {
            "text": {
              "content": response
            }
          }
        ]
      }
    }
  }
  response = requests.post(url, headers=headers, json=data)
  print(response.status_code)

Example usage
page_id = "YOUR_NOTION_PAGE_ID"
token = "YOUR_NOTION_API_TOKEN"

Get ChatGPT responses (replace with your actual ChatGPT interaction)
chatgpt_responses = [
  "This is the first ChatGPT response.",
  "This is the second ChatGPT response.",
  "This is the third ChatGPT response."
]

Save each response to Notion
for response in chatgpt_responses:
  save_chatgpt_response_to_notion(response, page_id, token)
```

4. Run the Script:
   - In your terminal, navigate to the directory where you saved the Python file.
   - Type `python save_chatgpt_to_notion.py` and press Enter.

5. Check Notion:
   - Open your Notion workspace and go to the page specified by `page_id`.
   - You should see your ChatGPT responses saved as separate blocks.
View Detail

Batch Save ChatGPT to Notion This is a guide on how to save multiple ChatGPT responses to Notion in a batch. Tools You'll Need: * ChatGPT: An AI chatbot that can generate text. * Notion: A note-taking and project management tool. * Python: A programming language. * Requests Library: A Python library for making HTTP requests. Steps: 1. Get Your Notion API Token: - Go to your Notion workspace settings. - Navigate to the "Integrations" tab. - Click "Create new integration" and choose "API Token". - Copy your API token. 2. Install Python Libraries: - Open your terminal or command prompt. - Type `pip install requests` and press Enter. 3. Write Python Script: - Create a new Python file (e.g., `save_chatgpt_to_notion.py`). - Paste the following code into the file, replacing `YOUR_NOTION_API_TOKEN` with your actual token: ```python import requests def save_chatgpt_response_to_notion(response, page_id, token): """Saves a ChatGPT response to a Notion page.""" url = f"https://api.notion.com/v1/pages/{page_id}/children" headers = {"Authorization": f"Bearer {token}"} data = { "parent": { "page_id": page_id }, "properties": { "title": { "title": [ { "text": { "content": "ChatGPT Response" } } ] }, "content": { "rich_text": [ { "text": { "content": response } } ] } } } response = requests.post(url, headers=headers, json=data) print(response.status_code) Example usage page_id = "YOUR_NOTION_PAGE_ID" token = "YOUR_NOTION_API_TOKEN" Get ChatGPT responses (replace with your actual ChatGPT interaction) chatgpt_responses = [ "This is the first ChatGPT response.", "This is the second ChatGPT response.", "This is the third ChatGPT response." ] Save each response to Notion for response in chatgpt_responses: save_chatgpt_response_to_notion(response, page_id, token) ``` 4. Run the Script: - In your terminal, navigate to the directory where you saved the Python file. - Type `python save_chatgpt_to_notion.py` and press Enter. 5. Check Notion: - Open your Notion workspace and go to the page specified by `page_id`. - You should see your ChatGPT responses saved as separate blocks.

Batch Save ChatGPT to Notion This is a guide on how to save multiple ChatGPT responses to Notion in a batch. Tools You'll Need: * ChatGPT: An AI chatbot that can generate text. * Notion: A note-taking and project management tool. * Python: A programming language. * Requests Library: A Python library for making HTTP requests. Steps: 1. Get Your Notion API Token: - Go to your Notion workspace settings. - Navigate to the "Integrations" tab. - Click "Create new integration" and choose "API Token". - Copy your API token. 2. Install Python Libraries: - Open your terminal or command prompt. - Type `pip install requests` and press Enter. 3. Write Python Script: - Create a new Python file (e.g., `save_chatgpt_to_notion.py`). - Paste the following code into the file, replacing `YOUR_NOTION_API_TOKEN` with your actual token: ```python import requests def save_chatgpt_response_to_notion(response, page_id, token): """Saves a ChatGPT response to a Notion page.""" url = f"https://api.notion.com/v1/pages/{page_id}/children" headers = {"Authorization": f"Bearer {token}"} data = { "parent": { "page_id": page_id }, "properties": { "title": { "title": [ { "text": { "content": "ChatGPT Response" } } ] }, "content": { "rich_text": [ { "text": { "content": response } } ] } } } response = requests.post(url, headers=headers, json=data) print(response.status_code) Example usage page_id = "YOUR_NOTION_PAGE_ID" token = "YOUR_NOTION_API_TOKEN" Get ChatGPT responses (replace with your actual ChatGPT interaction) chatgpt_responses = [ "This is the first ChatGPT response.", "This is the second ChatGPT response.", "This is the third ChatGPT response." ] Save each response to Notion for response in chatgpt_responses: save_chatgpt_response_to_notion(response, page_id, token) ``` 4. Run the Script: - In your terminal, navigate to the directory where you saved the Python file. - Type `python save_chatgpt_to_notion.py` and press Enter. 5. Check Notion: - Open your Notion workspace and go to the page specified by `page_id`. - You should see your ChatGPT responses saved as separate blocks.

Save ChatGPT Conversations to Notion with One Click Export your ChatGPT conversations directly to Notion with a single click.

193.90 M