Open-source RightAI Tools Directory
  • Discover AI
  • Submit
  • Startup
  • Blog
Open-source RightAI Tools Directory
Discover the best AI tools of 2025 with the RightAI Tools Directory!

Friend Links

AI Anime GeneratorToolsApp AI

Support

Tap4
Privacy policyTerms & ConditionsContact Us
Loading...
loading...

Veggie AI: Generate Controllable Videos Using AI

Create fully controllable videos using Veggie AI by simply uploading your character photos, action videos, or inputting text prompts.
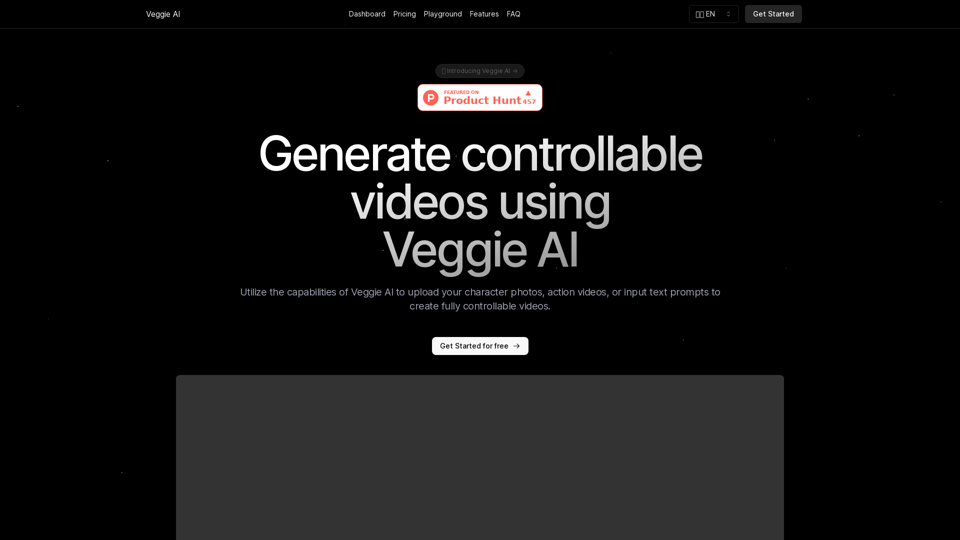
Visit Website
Veggie AI: Generate Controllable Videos Using AI
Visit Website

Introduction

Veggie AI is an innovative online tool that harnesses AI technology to create controllable videos. Users can input images, videos, or text prompts to generate short, dynamic videos that align with specified actions and character descriptions. This user-friendly platform is accessible to anyone, regardless of their AI expertise.

Feature

Four Versatile Creation Modes

Veggie AI offers four distinct modes for creating controllable videos:

  1. Mix Mode
  2. Animate Mode
  3. Ideate Mode
  4. Stylize Mode

Each mode allows users to upload custom character photos, action videos, or text prompts to generate dynamic videos.

User-Friendly Interface

The platform is designed for ease of use, requiring no prior AI knowledge. Users can create fully controllable and engaging videos in just a few simple steps.

Quick Generation Process

Video creation typically takes only a few minutes, making it an efficient tool for various applications.

Flexible Input Options

Veggie AI supports a range of input materials:

  • Common image formats (JPEG, PNG)
  • Standard video formats (MP4)
  • Text prompts for style customization

Versatile Output Usage

Generated videos can be used for both personal and commercial purposes, including:

  • Social media content
  • Marketing materials
  • Advertisements

Affordable Pricing

Veggie AI offers simple, budget-friendly pricing plans packed with features to engage audiences, build customer loyalty, and drive sales.

FAQ

What is Veggie AI?

Veggie AI is an online tool that uses AI technology to generate controllable videos based on user inputs such as images, videos, or text prompts.

How do I use Veggie AI?

Using Veggie AI is straightforward:

  1. Choose your creation method
  2. Upload your materials
  3. Wait for the AI to generate your video (usually takes a few minutes)

What input formats does Veggie AI support?

Veggie AI supports:

  • Common image formats (JPEG, PNG)
  • Standard video formats (MP4)

Can I customize the style of the generated video?

Yes, you can input simple prompt words to choose the style of the generated video.

Is Veggie AI free to use?

No, Veggie AI does not offer a free trial. To use the service, you need to purchase credits.

Does Veggie AI support batch processing?

Currently, Veggie AI primarily focuses on single video generation.

Latest Traffic Insights

  • Monthly Visits

    6.27 K

  • Bounce Rate

    39.25%

  • Pages Per Visit

    3.02

  • Time on Site(s)

    102.77

  • Global Rank

    2696785

  • Country Rank

    Brazil 228060

Recent Visits

Traffic Sources

  • Social Media:
    6.41%
  • Paid Referrals:
    0.75%
  • Email:
    0.06%
  • Referrals:
    26.83%
  • Search Engines:
    48.66%
  • Direct:
    17.29%
More Data

Related Websites

Soulreply - Your mental health assistant
View Detail

Soulreply - Your mental health assistant

Soulreply - Your mental health assistant

Discover a supportive and understanding mental health bot designed to help you manage stress, anxiety, and everyday emotional challenges. Accessible anytime to provide guidance, resources, and comfort, ensuring you never feel alone in your journey towards mental wellness.

0
H1B Sponsor Checker by H1BGrader
View Detail

H1B Sponsor Checker by H1BGrader

H1B Sponsor Checker by H1BGrader

View H1B Sponsorship salaries, LCA/USCIS data, and insights for employers and their job postings while browsing Linkedin, and Indeed

290.25 M
AI Product Shot - Create Beautiful Product Images with AI
View Detail

AI Product Shot - Create Beautiful Product Images with AI

AI Product Shot - Create Beautiful Product Images with AI

AI Product Shot - Create stunning and professional AI-generated product images that boost your sales. Achieve expert-level product photos using AI technology. Begin your journey for free.

2.41 K
AI Baby Generator: FutureBaby on the App Store
View Detail

AI Baby Generator: FutureBaby on the App Store

AI Baby Generator: FutureBaby on the App Store

Introducing the FutureBaby: AI Baby Generator app, an innovative tool that predicts the potential appearance of your future child by analyzing the facial features of you and your partner.

120.34 M
Batch Save ChatGPT to Notion

This is a guide on how to save multiple ChatGPT responses to Notion in a batch. 

Tools You'll Need:

* ChatGPT: An AI chatbot that can generate text.
* Notion: A note-taking and project management tool.
* Python: A programming language.
* Requests Library: A Python library for making HTTP requests.

Steps:

1. Get Your Notion API Token:
   - Go to your Notion workspace settings.
   - Navigate to the "Integrations" tab.
   - Click "Create new integration" and choose "API Token".
   - Copy your API token.

2. Install Python Libraries:
   - Open your terminal or command prompt.
   - Type `pip install requests` and press Enter.

3. Write Python Script:
   - Create a new Python file (e.g., `save_chatgpt_to_notion.py`).
   - Paste the following code into the file, replacing `YOUR_NOTION_API_TOKEN` with your actual token:

```python
import requests

def save_chatgpt_response_to_notion(response, page_id, token):
  """Saves a ChatGPT response to a Notion page."""
  url = f"https://api.notion.com/v1/pages/{page_id}/children"
  headers = {"Authorization": f"Bearer {token}"}
  data = {
    "parent": {
      "page_id": page_id
    },
    "properties": {
      "title": {
        "title": [
          {
            "text": {
              "content": "ChatGPT Response"
            }
          }
        ]
      },
      "content": {
        "rich_text": [
          {
            "text": {
              "content": response
            }
          }
        ]
      }
    }
  }
  response = requests.post(url, headers=headers, json=data)
  print(response.status_code)

Example usage
page_id = "YOUR_NOTION_PAGE_ID"
token = "YOUR_NOTION_API_TOKEN"

Get ChatGPT responses (replace with your actual ChatGPT interaction)
chatgpt_responses = [
  "This is the first ChatGPT response.",
  "This is the second ChatGPT response.",
  "This is the third ChatGPT response."
]

Save each response to Notion
for response in chatgpt_responses:
  save_chatgpt_response_to_notion(response, page_id, token)
```

4. Run the Script:
   - In your terminal, navigate to the directory where you saved the Python file.
   - Type `python save_chatgpt_to_notion.py` and press Enter.

5. Check Notion:
   - Open your Notion workspace and go to the page specified by `page_id`.
   - You should see your ChatGPT responses saved as separate blocks.
View Detail

Batch Save ChatGPT to Notion This is a guide on how to save multiple ChatGPT responses to Notion in a batch. Tools You'll Need: * ChatGPT: An AI chatbot that can generate text. * Notion: A note-taking and project management tool. * Python: A programming language. * Requests Library: A Python library for making HTTP requests. Steps: 1. Get Your Notion API Token: - Go to your Notion workspace settings. - Navigate to the "Integrations" tab. - Click "Create new integration" and choose "API Token". - Copy your API token. 2. Install Python Libraries: - Open your terminal or command prompt. - Type `pip install requests` and press Enter. 3. Write Python Script: - Create a new Python file (e.g., `save_chatgpt_to_notion.py`). - Paste the following code into the file, replacing `YOUR_NOTION_API_TOKEN` with your actual token: ```python import requests def save_chatgpt_response_to_notion(response, page_id, token): """Saves a ChatGPT response to a Notion page.""" url = f"https://api.notion.com/v1/pages/{page_id}/children" headers = {"Authorization": f"Bearer {token}"} data = { "parent": { "page_id": page_id }, "properties": { "title": { "title": [ { "text": { "content": "ChatGPT Response" } } ] }, "content": { "rich_text": [ { "text": { "content": response } } ] } } } response = requests.post(url, headers=headers, json=data) print(response.status_code) Example usage page_id = "YOUR_NOTION_PAGE_ID" token = "YOUR_NOTION_API_TOKEN" Get ChatGPT responses (replace with your actual ChatGPT interaction) chatgpt_responses = [ "This is the first ChatGPT response.", "This is the second ChatGPT response.", "This is the third ChatGPT response." ] Save each response to Notion for response in chatgpt_responses: save_chatgpt_response_to_notion(response, page_id, token) ``` 4. Run the Script: - In your terminal, navigate to the directory where you saved the Python file. - Type `python save_chatgpt_to_notion.py` and press Enter. 5. Check Notion: - Open your Notion workspace and go to the page specified by `page_id`. - You should see your ChatGPT responses saved as separate blocks.

Batch Save ChatGPT to Notion This is a guide on how to save multiple ChatGPT responses to Notion in a batch. Tools You'll Need: * ChatGPT: An AI chatbot that can generate text. * Notion: A note-taking and project management tool. * Python: A programming language. * Requests Library: A Python library for making HTTP requests. Steps: 1. Get Your Notion API Token: - Go to your Notion workspace settings. - Navigate to the "Integrations" tab. - Click "Create new integration" and choose "API Token". - Copy your API token. 2. Install Python Libraries: - Open your terminal or command prompt. - Type `pip install requests` and press Enter. 3. Write Python Script: - Create a new Python file (e.g., `save_chatgpt_to_notion.py`). - Paste the following code into the file, replacing `YOUR_NOTION_API_TOKEN` with your actual token: ```python import requests def save_chatgpt_response_to_notion(response, page_id, token): """Saves a ChatGPT response to a Notion page.""" url = f"https://api.notion.com/v1/pages/{page_id}/children" headers = {"Authorization": f"Bearer {token}"} data = { "parent": { "page_id": page_id }, "properties": { "title": { "title": [ { "text": { "content": "ChatGPT Response" } } ] }, "content": { "rich_text": [ { "text": { "content": response } } ] } } } response = requests.post(url, headers=headers, json=data) print(response.status_code) Example usage page_id = "YOUR_NOTION_PAGE_ID" token = "YOUR_NOTION_API_TOKEN" Get ChatGPT responses (replace with your actual ChatGPT interaction) chatgpt_responses = [ "This is the first ChatGPT response.", "This is the second ChatGPT response.", "This is the third ChatGPT response." ] Save each response to Notion for response in chatgpt_responses: save_chatgpt_response_to_notion(response, page_id, token) ``` 4. Run the Script: - In your terminal, navigate to the directory where you saved the Python file. - Type `python save_chatgpt_to_notion.py` and press Enter. 5. Check Notion: - Open your Notion workspace and go to the page specified by `page_id`. - You should see your ChatGPT responses saved as separate blocks.

Save ChatGPT Conversations to Notion with One Click Export your ChatGPT conversations directly to Notion with a single click.

290.25 M
Create Stunning Disney-Style Posters with Our Cartoon AI Generator
View Detail

Create Stunning Disney-Style Posters with Our Cartoon AI Generator

Create Stunning Disney-Style Posters with Our Cartoon AI Generator

Create stunning Disney Pixar movie posters effortlessly with AI technology. pixar ai generator allows you to generate professional pixar&disney posters with ease.

330
Grok AI Image Generator
View Detail

Grok AI Image Generator

Grok AI Image Generator

Generate Grok AI Images Free Online with Flux. Free Online | No Credit Card or Login Required

31.92 K
Recally - The Best Screenshot Management App for macOS
View Detail

Recally - The Best Screenshot Management App for macOS

Recally - The Best Screenshot Management App for macOS

Recally is the best app to manage your screenshots on macOS. Organize, browse, and search your screenshots with ease. Available on macOS.

0