Open-source RightAI Tools Directory
  • Discover AI
  • Submit
  • Startup
  • Blog
Open-source RightAI Tools Directory
Discover the best AI tools of 2025 with the RightAI Tools Directory!

Friend Links

AI Anime GeneratorToolsApp AI

Support

Tap4
Privacy policyTerms & ConditionsContact Us
Loading...
loading...

SEOAIBOT

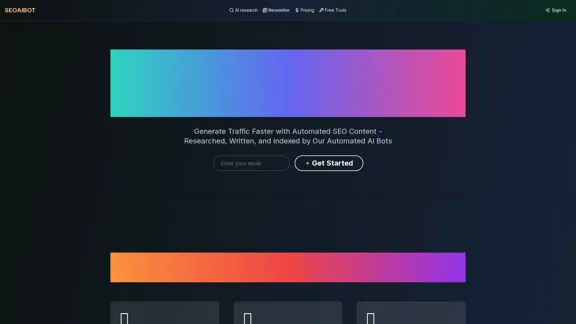
SEOAIBOT is an AI-powered content creation platform designed to automate the process of researching, writing, and indexing high-quality articles for SEO purposes
Visit Website
SEOAIBOT
Visit Website

Introduction

SEOAIBOT is an AI-powered content creation platform designed to automate the process of researching, writing, and indexing high-quality articles for SEO purposes. It aims to help businesses and content creators generate traffic faster by producing in-depth, well-structured content on autopilot.

Feature

  1. AI-Powered Research

    • Conducts thorough investigations on given topics
    • Gathers comprehensive information from diverse, credible sources
    • Saves hours of manual research time
  2. Content Generation

    • Produces well-structured, long-form articles
    • Creates content that provides real value to readers
    • Offers different writing tones (professional, conversational, persuasive, technical)
  3. SEO Optimization

    • Crafts articles with search engines in mind
    • Optimizes keyword placement and HTML structure
    • Performs AI keyword research targeting competitors' keywords
    • Analyzes keyword difficulty and search volume
  4. Automatic WordPress Publishing

    • Seamlessly integrates with WordPress sites
    • Publishes articles directly from creation to the website
    • Supports multiple WordPress sites (varies by plan)
  5. Google Index Submission

    • Automatically submits newly published content to Google for indexing
    • Enables rapid appearance in search engine results pages (SERPs)
    • Allows indexing of any page, even those not created by the system
  6. AI Multi-Agent System

    • Designed to minimize human interaction while maintaining control
    • Enables scalable content generation
  7. Customizable Plans

    • Offers BYOK (Bring Your Own Key) plans for flexibility
    • Provides options to use personal OpenAI API keys
    • Scales from 50 to 500 generations per month

How to Use?

  1. Start by inputting your desired article topics or keywords in batches.

  2. Let the AI conduct thorough research on these keywords.

  3. Review the generated content before publishing to ensure it meets your standards.

  4. Utilize the keyword research feature to target high-potential, long-tail keywords.

  5. Take advantage of the automatic Google indexing to boost your content's visibility quickly.

  6. Experiment with different writing tones to find what resonates best with your audience.

  7. Monitor your organic traffic growth and adjust your content strategy accordingly.

FAQ

How does your service differ from basic AI writing tools?

SEOAIBOT goes beyond basic AI generation by offering a comprehensive system that includes automated research, writing, and submission to Google Index. It uses an AI multi-agent system designed to minimize human interaction while maintaining control throughout the process.

How do you ensure the content is SEO-optimized?

Every article is crafted with search engines in mind. This includes optimal keyword placement, proper HTML structure, and thorough keyword research based on competitors, seed keywords, queries, and local SEO factors. The system also analyzes keyword difficulty and search volume to target the most effective keywords.

Is the WordPress integration secure?

While specific security details aren't provided, the service offers seamless integration with WordPress sites. It's advisable to contact SEOAIBOT directly for more information about their security measures and best practices for safe integration.

Can I review articles before they're published?

The system is designed to minimize human interaction, but it's likely that there are options to review content before publication. It's best to check with SEOAIBOT's support team for specific details on how to implement a review process within their automated system.

Can I connect non-WordPress sites?

Yes, SEOAIBOT offers webhooks for non-WordPress sites, allowing you to integrate the service with other content management systems or custom websites.

Price

  • BYOK Basic: $45/month (50 generations/month)
  • BYOK Starter: $85/month (100 generations/month)
  • BYOK Growth: $203/month (250 generations/month)
  • BYOK Pro: $405/month (500 generations/month)

All plans offer a 10% discount on the regular price as a launch offer.

The price is for reference only, please refer to the latest official data for actual information.

Evaluation

  1. SEOAIBOT offers a comprehensive solution for businesses looking to scale their content creation and SEO efforts. The combination of AI-powered research, writing, and automatic indexing can significantly reduce the time and resources required for content marketing.

  2. The BYOK model, allowing users to use their own OpenAI API keys, provides flexibility and potentially better cost control for businesses with existing API arrangements.

  3. The automatic submission to Google Index is a standout feature, potentially accelerating the visibility of new content in search results.

  4. While the system promises minimal human interaction, this could be a double-edged sword. It may save time, but it also risks producing content that lacks a human touch or fails to capture nuanced brand voices.

  5. The pricing structure, while offering a range of options, may be steep for small businesses or individual bloggers, especially considering the limited number of generations in lower-tier plans.

  6. The platform's effectiveness will largely depend on the quality of the AI-generated content and its ability to truly engage readers and meet Google's increasingly sophisticated content quality standards.

  7. Users should be cautious about over-relying on automated content generation, as search engines like Google have expressed concerns about AI-generated content. It's crucial to ensure that the final output is high-quality, original, and provides genuine value to readers.

Related Websites

Claude to Notion

This is a guide on how to connect Claude, an AI assistant, with Notion, a note-taking and workspace app. 

Why connect Claude and Notion?

* Boost your productivity: Use Claude to generate content, summarize information, and automate tasks directly within Notion.
* Enhance your research: Ask Claude questions about your Notion notes and get insightful answers.
* Unlock new creative possibilities: Leverage Claude's generative capabilities to brainstorm ideas, write stories, or compose emails within your Notion workspace.

How to connect Claude and Notion:

1. API Keys: Obtain an API key for both Claude and Notion. 
2. Integration Tool: Explore integration tools like Zapier or Integromat to connect Claude and Notion. These platforms allow you to create workflows that trigger actions in one app based on events in the other.
3. Custom Development: For advanced users, you can develop your own custom integration using the Claude and Notion APIs. This gives you the most flexibility but requires coding knowledge.

Example Use Cases:

* Meeting Summarization: After a meeting, paste the transcript into Notion and use Claude to generate a concise summary.
* Content Creation:  Use Claude to write blog posts, articles, or social media captions directly within your Notion pages.
* Idea Generation: Brainstorm new ideas for projects or tasks by prompting Claude with specific questions within your Notion workspace.


Remember to review the documentation and terms of service for both Claude and Notion to ensure proper usage and security.
View Detail

Claude to Notion This is a guide on how to connect Claude, an AI assistant, with Notion, a note-taking and workspace app. Why connect Claude and Notion? * Boost your productivity: Use Claude to generate content, summarize information, and automate tasks directly within Notion. * Enhance your research: Ask Claude questions about your Notion notes and get insightful answers. * Unlock new creative possibilities: Leverage Claude's generative capabilities to brainstorm ideas, write stories, or compose emails within your Notion workspace. How to connect Claude and Notion: 1. API Keys: Obtain an API key for both Claude and Notion. 2. Integration Tool: Explore integration tools like Zapier or Integromat to connect Claude and Notion. These platforms allow you to create workflows that trigger actions in one app based on events in the other. 3. Custom Development: For advanced users, you can develop your own custom integration using the Claude and Notion APIs. This gives you the most flexibility but requires coding knowledge. Example Use Cases: * Meeting Summarization: After a meeting, paste the transcript into Notion and use Claude to generate a concise summary. * Content Creation: Use Claude to write blog posts, articles, or social media captions directly within your Notion pages. * Idea Generation: Brainstorm new ideas for projects or tasks by prompting Claude with specific questions within your Notion workspace. Remember to review the documentation and terms of service for both Claude and Notion to ensure proper usage and security.

Claude to Notion This is a guide on how to connect Claude, an AI assistant, with Notion, a note-taking and workspace app. Why connect Claude and Notion? * Boost your productivity: Use Claude to generate content, summarize information, and automate tasks directly within Notion. * Enhance your research: Ask Claude questions about your Notion notes and get insightful answers. * Unlock new creative possibilities: Leverage Claude's generative capabilities to brainstorm ideas, write stories, or compose emails within your Notion workspace. How to connect Claude and Notion: 1. API Keys: Obtain an API key for both Claude and Notion. 2. Integration Tool: Explore integration tools like Zapier or Integromat to connect Claude and Notion. These platforms allow you to create workflows that trigger actions in one app based on events in the other. 3. Custom Development: For advanced users, you can develop your own custom integration using the Claude and Notion APIs. This gives you the most flexibility but requires coding knowledge. Example Use Cases: * Meeting Summarization: After a meeting, paste the transcript into Notion and use Claude to generate a concise summary. * Content Creation: Use Claude to write blog posts, articles, or social media captions directly within your Notion pages. * Idea Generation: Brainstorm new ideas for projects or tasks by prompting Claude with specific questions within your Notion workspace. Remember to review the documentation and terms of service for both Claude and Notion to ensure proper usage and security.

Save Claude conversations to Notion with one click. Export Claude conversations.

193.90 M
PixCleaner
View Detail

PixCleaner

PixCleaner

Remove the background from an image using pixcleaner background remover. Remove the background from any image online URL, simply...

193.90 M
QuickReadAI
View Detail

QuickReadAI

QuickReadAI

Please provide me with the text you'd like me to summarize. 😊

193.90 M
Beatwave: Create Audio & Music Visualizers in Just a Few Clicks
View Detail

Beatwave: Create Audio & Music Visualizers in Just a Few Clicks

Beatwave: Create Audio & Music Visualizers in Just a Few Clicks

Create engaging audio & music visualizers in seconds with Beatwave. Turn your tracks, beats, audio and podcasts into engaging videos easily.

7.54 K
DecentralizedAI 

This is a general term referring to artificial intelligence (AI) systems that are not controlled by a single, centralized entity. 

Instead of relying on a large corporation or government to manage and govern AI, decentralized AI aims to distribute these capabilities across a network of independent nodes. 

Think of it like a blockchain for AI:

* Transparency:  The decision-making processes of decentralized AI are open and visible to everyone.
* Security:  Since there's no single point of failure, it's harder for malicious actors to take control or manipulate the system.
* Resilience:  Even if some nodes go offline, the network can continue to function.
* Accessibility:  Decentralized AI can make AI technology more accessible to individuals and smaller organizations.


There are many potential applications for decentralized AI, including:

* Data privacy:  Decentralized AI can help protect user data by distributing it across multiple nodes.
* Fairness and bias mitigation:  By involving a wider range of participants in the training process, decentralized AI can help reduce bias in AI systems.
* Autonomous organizations:  Decentralized AI can be used to create self-governing organizations that operate without human intervention.


Decentralized AI is still a relatively new field, but it has the potential to revolutionize the way we develop and use AI.
View Detail

DecentralizedAI This is a general term referring to artificial intelligence (AI) systems that are not controlled by a single, centralized entity. Instead of relying on a large corporation or government to manage and govern AI, decentralized AI aims to distribute these capabilities across a network of independent nodes. Think of it like a blockchain for AI: * Transparency: The decision-making processes of decentralized AI are open and visible to everyone. * Security: Since there's no single point of failure, it's harder for malicious actors to take control or manipulate the system. * Resilience: Even if some nodes go offline, the network can continue to function. * Accessibility: Decentralized AI can make AI technology more accessible to individuals and smaller organizations. There are many potential applications for decentralized AI, including: * Data privacy: Decentralized AI can help protect user data by distributing it across multiple nodes. * Fairness and bias mitigation: By involving a wider range of participants in the training process, decentralized AI can help reduce bias in AI systems. * Autonomous organizations: Decentralized AI can be used to create self-governing organizations that operate without human intervention. Decentralized AI is still a relatively new field, but it has the potential to revolutionize the way we develop and use AI.

DecentralizedAI This is a general term referring to artificial intelligence (AI) systems that are not controlled by a single, centralized entity. Instead of relying on a large corporation or government to manage and govern AI, decentralized AI aims to distribute these capabilities across a network of independent nodes. Think of it like a blockchain for AI: * Transparency: The decision-making processes of decentralized AI are open and visible to everyone. * Security: Since there's no single point of failure, it's harder for malicious actors to take control or manipulate the system. * Resilience: Even if some nodes go offline, the network can continue to function. * Accessibility: Decentralized AI can make AI technology more accessible to individuals and smaller organizations. There are many potential applications for decentralized AI, including: * Data privacy: Decentralized AI can help protect user data by distributing it across multiple nodes. * Fairness and bias mitigation: By involving a wider range of participants in the training process, decentralized AI can help reduce bias in AI systems. * Autonomous organizations: Decentralized AI can be used to create self-governing organizations that operate without human intervention. Decentralized AI is still a relatively new field, but it has the potential to revolutionize the way we develop and use AI.

The AI Layer2 Extension for Google Chrome.

193.90 M
Kometa AI – Your personal AI assistant!
View Detail

Kometa AI – Your personal AI assistant!

Kometa AI – Your personal AI assistant!

Don't delay preparing a response to a client. Respond immediately to any email, LinkedIn, HH, or WhatsApp message.

193.90 M
Get ChatGPT for Free with Google

You can now access ChatGPT, a powerful language model, for free with Google. Here's how:

Method 1: Google Colab

* Open Google Colab ([colab.research.google.com](http://colab.research.google.com))
* Create a new notebook
* Install the `transformers` library by running `!pip install transformers`
* Import the `transformers` library and load the ChatGPT model using `from transformers import AutoModelForCausalLM, AutoTokenizer; model = AutoModelForCausalLM.from_pretrained('chatgpt'); tokenizer = AutoTokenizer.from_pretrained('chatgpt')`
* Use the model to generate text using `input_text = "Your input here"; inputs = tokenizer.encode_plus(input_text, return_tensors='pt', max_length=1024, padding='max_length', truncation=True); output = model(inputs['input_ids'], attention_mask=inputs['attention_mask']); print(tokenizer.decode(output.logits[0], skip_special_tokens=True))`

Method 2: Google Apps Script

* Open Google Apps Script ([script.google.com](http://script.google.com))
* Create a new project
* Install the `transformers` library by running `npm install transformers`
* Import the `transformers` library and load the ChatGPT model using `const { AutoModelForCausalLM, AutoTokenizer } = require('transformers'); const model = new AutoModelForCausalLM('chatgpt'); const tokenizer = new AutoTokenizer('chatgpt');`
* Use the model to generate text using `const inputText = "Your input here"; const inputs = tokenizer.encodePlus(inputText, { return_tensors: 'pt', max_length: 1024, padding: 'max_length', truncation: true }); const output = model(inputs.inputIds, inputs.attentionMask); console.log(tokenizer.decode(output.logits[0], { skipSpecialTokens: true }));`

Note: These methods require some technical knowledge and may have limitations compared to the original ChatGPT model.
View Detail

Get ChatGPT for Free with Google You can now access ChatGPT, a powerful language model, for free with Google. Here's how: Method 1: Google Colab * Open Google Colab ([colab.research.google.com](http://colab.research.google.com)) * Create a new notebook * Install the `transformers` library by running `!pip install transformers` * Import the `transformers` library and load the ChatGPT model using `from transformers import AutoModelForCausalLM, AutoTokenizer; model = AutoModelForCausalLM.from_pretrained('chatgpt'); tokenizer = AutoTokenizer.from_pretrained('chatgpt')` * Use the model to generate text using `input_text = "Your input here"; inputs = tokenizer.encode_plus(input_text, return_tensors='pt', max_length=1024, padding='max_length', truncation=True); output = model(inputs['input_ids'], attention_mask=inputs['attention_mask']); print(tokenizer.decode(output.logits[0], skip_special_tokens=True))` Method 2: Google Apps Script * Open Google Apps Script ([script.google.com](http://script.google.com)) * Create a new project * Install the `transformers` library by running `npm install transformers` * Import the `transformers` library and load the ChatGPT model using `const { AutoModelForCausalLM, AutoTokenizer } = require('transformers'); const model = new AutoModelForCausalLM('chatgpt'); const tokenizer = new AutoTokenizer('chatgpt');` * Use the model to generate text using `const inputText = "Your input here"; const inputs = tokenizer.encodePlus(inputText, { return_tensors: 'pt', max_length: 1024, padding: 'max_length', truncation: true }); const output = model(inputs.inputIds, inputs.attentionMask); console.log(tokenizer.decode(output.logits[0], { skipSpecialTokens: true }));` Note: These methods require some technical knowledge and may have limitations compared to the original ChatGPT model.

Get ChatGPT for Free with Google You can now access ChatGPT, a powerful language model, for free with Google. Here's how: Method 1: Google Colab * Open Google Colab ([colab.research.google.com](http://colab.research.google.com)) * Create a new notebook * Install the `transformers` library by running `!pip install transformers` * Import the `transformers` library and load the ChatGPT model using `from transformers import AutoModelForCausalLM, AutoTokenizer; model = AutoModelForCausalLM.from_pretrained('chatgpt'); tokenizer = AutoTokenizer.from_pretrained('chatgpt')` * Use the model to generate text using `input_text = "Your input here"; inputs = tokenizer.encode_plus(input_text, return_tensors='pt', max_length=1024, padding='max_length', truncation=True); output = model(inputs['input_ids'], attention_mask=inputs['attention_mask']); print(tokenizer.decode(output.logits[0], skip_special_tokens=True))` Method 2: Google Apps Script * Open Google Apps Script ([script.google.com](http://script.google.com)) * Create a new project * Install the `transformers` library by running `npm install transformers` * Import the `transformers` library and load the ChatGPT model using `const { AutoModelForCausalLM, AutoTokenizer } = require('transformers'); const model = new AutoModelForCausalLM('chatgpt'); const tokenizer = new AutoTokenizer('chatgpt');` * Use the model to generate text using `const inputText = "Your input here"; const inputs = tokenizer.encodePlus(inputText, { return_tensors: 'pt', max_length: 1024, padding: 'max_length', truncation: true }); const output = model(inputs.inputIds, inputs.attentionMask); console.log(tokenizer.decode(output.logits[0], { skipSpecialTokens: true }));` Note: These methods require some technical knowledge and may have limitations compared to the original ChatGPT model.

How to Add ChatGPT to All Google Searches ===================================================== Step 1: Create a Custom Search Engine -------------------------------------- * Go to the [Google Custom Search Engine](https://cse.google.com/) website and sign in with your Google account. * Click on the "New Search Engine" button. * Fill in the required information, such as the name and description of your search engine. * Click on the "Create" button. Step 2: Add ChatGPT to the Search Engine ----------------------------------------- * In the "Setup" tab, click on the "Add" button next to "Sites to search". * Enter the following URL: `https://chat.openai.com/` * Click on the "Add" button. Step 3: Configure the Search Engine -------------------------------------- * In the "Setup" tab, click on the "Edit" button next to "Search engine keywords". * Add the following keywords: `ChatGPT` * Click on the "Save" button. Step 4: Get the Search Engine Code ------------------------------------- * In the "Setup" tab, click on the "Get code" button. * Copy the HTML code provided. Step 5: Add the Search Engine to Your Browser ------------------------------------------------ * Open your browser and go to the "Settings" or "Options" page. * Look for the "Search engine" or "Default search engine" option. * Click on the "Add" or "Manage search engines" button. * Paste the HTML code you copied earlier. * Click on the "Add" or "Save" button. You're Done! =============== Now, whenever you search on Google, ChatGPT will be included in the search results. You can also use the custom search engine URL provided by Google to search directly.

193.90 M
AiTab New Tab with ChatGPT
View Detail

AiTab New Tab with ChatGPT

AiTab New Tab with ChatGPT

AiTab new tab page, integrates AI capabilities such as AI Chat, drawing, translation, and integrated ChatGPT components

193.90 M